Showing posts with label Glitter Girl. Show all posts

Monday, 15 May 2023

Off We Go!

I'm still in Devon today, with the first of three pages from a walk we did on Easter Sunday. I've chosen to do three single pages rather than a double as there were three distinct parts to the walk. The first was Fernworthy Reservoir, where we walked down one side and crossed the river below the dam.

I'd printed two 4x6 photos and went in search of a layout that wouldn't have me putting them together in a 8x6 block, which I do often and it gets repetitive. I hit upon Glitter Girl Adventure 59, where the photos are offset by the addition of a journalling card, and took it from there.

I had less journalling so went with patterned paper and a larger title on the left, while Shimelle's square icons became circles on my page.


Supplies
Paper - Simple Stories Safe Travels, Amy Tangerine Shine On
Letters - October Afternoon
Journalling Card - Unknown
Word Sticker - OneCanoeTwo
Puffy Stars - Elle's Studio
Washi Tape - Unknown
Enamel Dots - Simple Stories

Tools
Big Shot & Spellbinders Circle Die


Monday, 23 December 2019

Flåm Kyrkje

I'm going back to my cruise album today, as I have now received the last batch of photos. This included a 5x7 print of Flåm Church, which replaces the 4x6 that I had previously; when I started making this page, I found that the actual church on the 4x6 print was too small in comparison with the interior photos and the page felt unbalanced, so I went for the larger size on my next order.
Glitter Girl's Page

Flåm Church dates from 1670 and is in the old village, a few kilometres inland from the modern, tourism-focused area next to the fjord. The interior is completely made of wood, with paintings of trees and mammals around the walls.

My page started out as a scraplift from Glitter Girl Adventure 136, but it morphed a little, as so many of my pages do. I have fewer layers, most of which are scraps and off-cuts from other pages in the album, and I moved my title as the open area there on my page was the obvious spot to use.


Supplies
Paper - American Crafts/Shimelle Head on the Clouds, Pinkfresh Studio Out and About, Pink Paislee C'est la Vie, Pinkfresh Studio A Case of the Blahs, Echo Park Summer Dreams, KaiserCraft Finders Keepers, American Crafts/Dear Lizzy Saturday
Letters - American Crafts
Puffy Stickers - Freckled Fawn
Washi Tape - Unknown
Enamel Dots - Marianne Designs, Echo Park, My Mind's Eye
Ink - Memento
Mist - Docrafts

Tools
Big Shot
Dovecraft Tag and Label Dies
Woodware Postage Stamp Punch
X-Cut Circle Punch

Saturday, 21 September 2019

Gala Night

Shimelle's Page
Another cruise album page today, but this won't be the next one chronologically. I'm waiting on a photo order so I have to work with what I have at the moment, which means the picture that the ship's photographer took on the first Gala Night of the cruise.

My page is a scraplift from Glitter Girl Adventure 30, a video from Shimelle Laine which she published way back in 2012. 


Supplies
Cardstock - Bazzill
Paper - Pinkfresh Studio A Case of the Blahs, Pinkfresh Studio Out and About
Letters - American Crafts
Insta-Card - Pink Paislee Atlas
Die-Cuts - Pinkfresh Studio, Pink Paislee/Paige Evans
Stickers - Elle's Studio, Pink Paislee #Stickerboook
Enamel Dots - Echo Park
Washi Tape - Unknown
Ink - Memento
Mist - Docrafts

Saturday, 20 April 2019

Praça do Comércio

Glitter Girl's Page
Back to the cruise album now, and more pages from Lisbon. We cruised up the River Tagus past the Praça do Comercio, a large square open to the riverfront, as we arrived and then visited it on foot later on. I picked a photo from each time but didn't want to line them up together because of the different perspectives. 

I scouted around for an alternative page layout using two 4x6 photos and hit on Glitter Girl Adventure 59, which I decided to flip horizontally so that the earlier photograph would clearly be before the later one as your eyes run across the page from top left to bottom right.


Supplies
Paper - Jillibean Soup Soup Staples, OneCanoeTwo Twilight & Creekside, Teresa Collins, American Crafts/Shimelle
Letters - American Crafts
Cards - Project Life, Quirky Kits
Stickers - Freckled Fawn
Washi Tape - Stampin' Up!
Star Gems - Papermania
Enamel Dots - My Mind's Eye
Ink - Memento
Mist - Docrafts

Tools
Big Shot & Label Die
Woodware Postage Stamp Punch

Tuesday, 26 June 2018

Mind the Gap

It's been ages since I made a page from our cruise to Iceland, Greenland and Norway last summer. First a poorly computer separated me from my organised photos, then the madness of National Scrapbooking Day (which just wasn't suited to working on this album), and finally a lack of scrapping time recently all mean that it's been three months since my last page.

I'd rather like to get this album finished before we cruise again later this year. Otherwise I know that the newer photos will demand my attention and I'll never get this one done. (Ask me how I know - I haven't finished a holiday album from 2009 yet and it's haunting me.)

So... it's back to Iceland and a tour we took from Akureyri. It was the only ship's tour we did, we normally prefer to do our own thing but this seemed to be the best way of seeing the geology of a country shaped by volcanic activity. One of the places we visited was Dimmuborgir National Park, and our guide stopped beside this crack in the ground to explain that it is the boundary between the North American and Eurasian tectonic plates, which are moving apart at the rate of around 1" per year.


Shimelle's Page
I printed a couple of photos of the fault line, one in 4x6 and one in 3x4 as they are different in scale and I didn't think they would work as a pair if I printed them at the same size, and then went looking for a sketch or scraplift that suited them. I came up with Glitter Girl Adventure 056, where Shimelle had a deliberate space between her two photos that I found attractive. 

My page isn't a carbon copy; once I had the initial placement of photos and mats I did my own thing with the positioning of my title, journalling and embellishments.


Supplies
Cardstock - Craft Sensations, Bazzill, Papermania
Paper - Photo Play Boarding Pass, Jillibean Soup Staples, Basic Grey, Pink Paislee Memorandum
Letters - American Crafts

Tag - American Crafts/Amy Tangerine
Word Stickers - Tim Holtz
Washi Tape - Ebay, Little B
Enamel Dots - Studio Calico, Simple Stories
Ink - Ranger

Mist - Mister Huey's, Docrafts

Tools
American Crafts/Shimelle Stamps
Big Shot & Spellbinders Circle Dies

Saturday, 20 February 2016

Red Bay

Red Bay, on the Labrador coast, was the last of the Canadian ports on our cruise last summer, and the only one on the mainland. We moored just outside the bay and used the ship's lifeboats to go ashore. 

This is my arrival/introduction page for Red Bay; I've made one for each port of call to divide up my album. The two photos are the view of the bay and a closer shot of the village both taken from the ship. I've taken inspiration from (i.e. copied) Glitter Girl's Adventure 128, placing my photos next to each other with strips of patterned paper above and below.


I'm also linking up with Shimelle's weekly challenge - to mix old scrapbooking stash with new. I would consider most of the things on this page to be "new" in that I bought them specifically for this album (even though they are up to 10 months old now). The stripy paper is definitely "old", I'm guessing 2010 though it could be earlier, and so are the turquoise gems and the label stickers. 

Supplies
Cardstock - Colorset
Paper - Heidi Swapp No Limits, Colorbok Travel, Pink Paislee Memorandum
Card - Project Life Summer
Letters - American Crafts
Stickers - 7Gypsies, Studio Calico
Brads - My Mind's Eye
Wood Veneer - Studio Calico
Gems - Papermania
Washi Tape - Unknown
Ink & Mist - Docrafts

Tools
Fiskars Shape Cutter & Circles Template
Stampendous 'Travel Words' Stamp
7Gypsies 'Collections from the Journey' Stamp


Monday, 25 January 2016

Little Artists

I recently won a gift voucher for The Cut Shoppe and I've been playing with my new cut files. One of my favourites is the Little Letters background file, and I did a trial cut on plain white card while playing with the settings on my Silhouette portrait. Once I'd cut it though, I decided to go ahead and use it on a page. The alphabet theme made me think of a school page, but then I remembered an old photo of my son and my nephew colouring, which I thought would work well with it.


I'd done most of the page before last Wednesday, and was pondering the embellishment when Glitter Girl posted her latest adventure - No. 125: Sticker Surplus. I was thinking about one small cluster, just overlapping the top right of the photo, but it was making the page unbalanced. Having watched Glitter Girl, I tried to follow her guidelines and decided to place two clusters in opposite corners. There's a diagonal line from one through the title to the other and they 'enclose' both the photo and the alphabet cut, which had begun to look a little separate from the rest of the page.

Supplies
Paper - Authentique Natural, My Mind's Eye Now & Then (6x6)
Letters - American Crafts, My Mind's Eye
Word Stickers - My Mind's Eye
Labels - Printable from Sarah's Cards Ltd
Pearls - Mark Richards
Washi Tape - Unknown
Ink - Docrafts

Tools
Silhouette Portrait

Other
Little Letters Cut File from The Cut Shoppe

Thursday, 4 December 2014

Weasleys' Wizard Wheezes

Glitter Girl / Shimelle Laine
I'm continuing with Diagon Alley pages from the Harry Potter Studio Tour with a page for Weasleys' Wizard Wheezes, Fred and George's joke shop. I initially had two 4x6 photos, one portrait and one landscape, and I started by scraplifting a page from Glitter Girl (her two photo page in Adventure 65) but I cut my landscape photo down to a square once I got started.

I didn't have enough papers left in my kit to copy Glitter Girl's large boxes of paper, but I got a similar effect by machine-stitching around my page. I also wrote a list of Weasleys' products along the stitched lines.


Supplies
Cardstock - Colorset, Bazzill
Paper - October Afternoon Witch Hazel, OA 9 to 5, OA Midway
Letters - OA Witch Hazel
Washi Tape - Pink Paislee
Glitter Tape - Making Memories
Brads - Papermania
Ink - Docrafts
Mist - Docrafts

Tools
Big Shot & Tag Die
Sewing Machine
Woodware Scalloped Circle Punch
X-Cut Small Circle Punch
Hobbycraft Star Punch
Woodware Tiny Star Punch


Sunday, 30 November 2014

Death Eaters

I'm hopping about in my Harry Potter Studio Tour album, making pages in no particular order, but the album is taking shape in my head, and will have several distinct sub-sections when it's finished.

This is a page for the 'Costumes' sub-section, with two photos of the Death Eaters. It's hard to know what to do with two landscape photos, that isn't a repeat of another page, so I went digging amongst Glitter Girl's pages that I saved from Two Peas in a Bucket, hitting on Adventure 14 from early in 2012. I scraplifted her design with strips of patterned paper matted next to the photos in the centre of the page, and added cardstock strips at the top and bottom of the page.


Supplies
Cardstock - Colorset, DCWV, Bazzill
Paper - October Afternoon Witch Hazel, OA 5 & Dime, OA Midway, OA Sidewalks
Vellum - from Stash
Doily - Papermania
Letters - Anita's Glitterations
Chipboard - Papermania 
Mist - Docrafts
Ink - Docrafts

Tools
Fiskars Postage Stamp Border Punch
Fiskars Shape Cutter and Circles Template

Friday, 14 November 2014

Harry - Ron - Hermione

Still with the Harry Potter pages, and this one will come in the Costumes sub-section of the album; it shows two sets of outfits worn by the principal characters. The top photo is the costumes from the Battle of Hogwarts; the bottom one shows Harry's invisibility cloak, with a green lining for the special effects to work.


The page is a scraplift of one from Glitter Girl's Scrapbooking Survival Guide, a class that I took at Two Peas in a Bucket. 

Supplies
Cardstock - Colorset, Bazzill
Paper - October Afternoon Witch Hazel, OA 5 & Dime, OA 9 to 5
Letters - Anita's Glitterations
Mist - Docrafts
Ink - Docrafts
Gems - Unknown

Tools
Fiskars Postage Stamp Border Punch
Big Shot & Circles Die
Woodware Scalloped Circle Punch
Woodware Tag Punch

Wednesday, 16 July 2014

10 in 10

It's been a little while since I shared a traditional 12x12 page, but I have one for you today. Last month, my husband took part in the 10 in 10 Challenge, climbing 10 Lake District peaks in 10 hours to raise funds for the MS Society. I wasn't there, and I scavenged photos from Facebook and Twitter for this page, the obligatory selfie at the start and the post-walk celebrations in the pub.

One landscape photo and one portrait photo can be awkward but with the imminent closure of Two Peas in a Bucket I had been reviewing Glitter Girl's videos, and spotted Adventure 54 where she had used this photo combination with a large journalling block, plenty of space for me to tell the story of the day.


This week's challenge at UKScrappers was set by Sue and she asked us to use four-in-a-row from this bingo card. I decided not to make a specific page for this, but to incorporate the elements into the next page where I could make them work.

I had already chosen the grid background paper and washi tape for this page (also two or more photos, numbers and squares) and I added stitching and wood veneer birds to complete Row 3. The birds might seem like an odd addition, but all these walkers use Twitter and share their walks via social media. In fact, my husband originally 'met' most of them via Twitter, and only subsequently met up face-to-face.

Supplies
Paper - Simple Stories Awesome, Simple Stories Take a Hike
Letters - American Crafts Thickers
Birds - Freckled Fawn
Washi Tape - Efco
Ink - Ranger
Thread - DMC

Tools
Big Shot & X-Cut Ticket Stubs Die
Fiskars Postage Stamp Border Punch


Tuesday, 8 October 2013

A Photo for Nan

I recently signed up for a new workshop at Two Peas in a Bucket - Glitter Girl's Scrapbook Survival Guide. It's self-paced with five chapters covering different strategies for scrapping more photographs, staying inspired - not overwhelmed - by your supplies, getting more from your tools, working with your most precious photos, and developing confidence in your own scrapbooking style.

This page is a scraplift of one of Glitter Girl's sample pages, and it's another page where I have killed off a collection of paper. I had two part sheets left and I could just about cut and piece them together to create a 12x12 background. I embellished with an offcut from making that, plus stickers and pearls.

The photo is one that I took in order to have a picture of both of my children so that I could send it to my Nan last Christmas.


Supplies
Paper, Border & Stickers  - Fancy Pants Winterland
Letters - Fancy Pants Home for Christmas
Ribbon & Pearls - from Stash

Monday, 26 August 2013

1 Cube, 2 Boys, 3rd Birthday

Over at Two Peas in a Bucket, Glitter Girl has been looking at making scrapbook pages with bolder background papers and her Adventure 83 gave us step-by-step instructions for making a page using the bold paper as a frame around the page. Her instructions included picking out two colours from the bold pattern and using single-coloured papers in those colours in the centre of the page, with a neutral mat to separate them from the background.

I've tried to scrap this photo of my son and nephew a couple of times using a zig-zag print from MME's Lime Twist collection. The colours suited the photo and the zig-zags conveyed a sense of movement, perfect for them rolling around the floor, but I couldn't get any further. By following Glitter Girl's instructions I was finally able to get the photo scrapped, and scrapped quite quickly.


Supplies
Cardstock - DCWV Neutral Stack, Papermania
Paper - MME Lime Twist, MME Miss Caroline, Lily Bee Double Dutch
Letters - October Afternoon
Numbers - American Crafts
Washi Tape - The Range
Ink - docrafts
Gems & Sequins - from Stash

Tools
Fiskars Postage Stamp Border Punch
Woodware Scalloped Circle Punch
Hobbycraft Star Punch

Friday, 26 April 2013

A Mess of Chocolate

On to my third page from Glitter Girl's Adventure 65 at Two Peas in a Bucket. This video was all about creating three pages from a limited kit of supplies, and I've already posted the first and second pages I made, with three and two photos respectively. 

The third page is a single photo layout, which Glitter Girl made by cutting leftover papers to rectangles and layering them up on the page with her photo on top. I had put my kit together from part sheets so I had trouble with this; I ended up pulling more pieces from my scraps box.


My photo is from my son's first Easter when he had been eating chocolate so the grungy papers tied in with the mess on his hands and face. I had previously used modelling paste and a stencil on one piece of paper in an experiment gone wrong, so I tore that and layered it in the mix. The white letters that I used on the previous pages were too large for this one, so I stamped my title in brown ink. I did the two lines separately and I must have used less pressure for the top line as I have ended up with a two tone title, but I don't mind that.

Supplies
Cardstock - MME Kraft Funday
Paper - Fancy Pants Papa, MME Follow Your Heart 6x6 Pad
Stickers - Crate Paper Farmhouse, October Afternoon, Cosmo Cricket
Modelling Paste - Farrel & Gold
Washi Tape - Trimcraft
Brads - Papermania
Ink - Dovecraft

Tools
Big Shot & X-Cut Ticket Stubs Die
Tando Creative Harlequin Mask
Pebbles ABC Stamps (Floral Lane)
Hobbycraft Medium Star Punch

Thursday, 25 April 2013

First Time Grandad

This is the second of three pages that I am making inspired by Glitter Girl's Adventure 65 at Two Peas in a Bucket, all about creating three pages from a limited kit of supplies; I shared the first one yesterday, so you might want to go back to that one.

Glitter Girl's two photo page used one landscape photo and one portrait photo, but her alter-ego Shimelle posted an alternative trio of pages on her blog, using the same kit principles. Shimelle's two photo page used two landscape photos and my page is closer to hers than the original Glitter Girl page.


My kit of papers was large enough that this page has very little in common with the previous one, just the red paper for the photo mat, a bit of washi tape and those large white letters. My title was slightly longer than the photo mat so I added the brown border sticker to disguise the mis-match and I think it worked.

My photos are of my baby son with his grandfather, but I had chosen the papers without particular photos in mind. My page ended up using rather heritage colours, so I changed the focus from the baby to the adult via my title. The dictionary paper has the definition of family (among other words) which I thought was perfect for the page.

Supplies
Cardstock - DCWV
Paper - Teresa Collins Timeless, Fancy Pants Wavesearcher, HOTP In the Kitchen, MME Follow Your Heart 6x6 Pad
Letters - American Crafts Simply Chic, Basic Grey Curio
Border Sticker - Echo Park
Paint - Folk Art Coffee Bean Acrylic Paint
Washi Tape - Trimcraft
Metal Swirls - Pebbles

Wednesday, 24 April 2013

Bath Time

I am an avid watcher of the Adventures of Glitter Girl videos at Two Peas in a Bucket and a couple of weeks ago she tackled the subject of increasing your productivity by limiting your supplies. She posted a kit list and guidance for creating three pages from that kit in her Adventure 65, those pages being designed around one, two and three 4x6 photos or photo blocks. I decided to give it a go, creating a kit with a lot of aqua, but also yellows, greens and reds. This is my first page - with three photos:
(NB The star on the third photo isn't part of the design - I think you know why it's there.)

Glitter Girl's page actually had a large block of journalling and a smaller title to the left of the photos, but I had very little to say, and I wanted to try and use up some older supplies, hence the very large title letters.

Supplies
Paper - Paper Adventures Tropical Breeze Sea Glass, Fancy Pants Wavesearcher
Letters - American Crafts Simply Chic
Washi Tape - Trimcraft

Tools
Woodware Scalloped Circle Punch
Hobbycraft Medium Star Punch
Woodware Tiny Star Punch

Monday, 23 July 2012

Thorpe Park

Last week's Glitter Girl Adventure (#29) at Two Peas in a bucket was about using paper with a scene rather than a pattern on it. I had a piece with a fairground scene on it, that I got as part of a mixed lot; I have pulled it out a few times, but I wasn't keen on the stalls across the bottom of the page and I wasn't sure how to use it. One of Glitter Girl's suggestions for pages like these was to cut the page down to 10x10 and surround it with a border, which was great as I could remove those stalls and concentrate on the ferris wheel.

We went to Thorpe Park a few weeks ago, so I decided to try using this paper with a group photo from the day:


It's not one of my favourite pages, but I've used that paper and got another photo scrapped.

Supplies
Paper - Sugartree, Echo Park  Yours Truly, Fancy Pants Beach Bum, Fancy Pants Fancy Free
Cardstock - Papermania
Letters, Stars, Ribbon & Paint - from Stash

Tools
Fiskars Postage Stamp Border Punch
Woodware Scalloped Circle Punch
X-Cut Small Circle Punch

Tuesday, 26 June 2012

2006 Annual Photo

Third post today - and I'm up to L in the ABC Crop at My Sketch World: L is for Lemon and lemons are yellow - create a layout with yellow as your main colour. I don't have much yellow paper, but I have a couple of sheets of alphabet paper which I bought for school photos and which have a yellow background. It's not a lemon yellow but it is certainly yellow.

I followed Glitter Girl's Adventure 20 at Two Peas in a Bucket for my layout as this video was all about scrapping large photos. There's no journalling as there isn't anything much to say about an annual school photo. 

Supplies
Paper - Karen Foster My ABCs, K&Co Hannah, plus scraps
Numbers - American Crafts Thickers
Letters - Doodlebug Rub-ons
Buttons - Fancy Pants

Tools
Fiskars Postage Stamp Border Punch
Woodware Scalloped Circle Punch
X-Cut Small Circle Punch

Tuesday, 29 May 2012

Friday Coffee

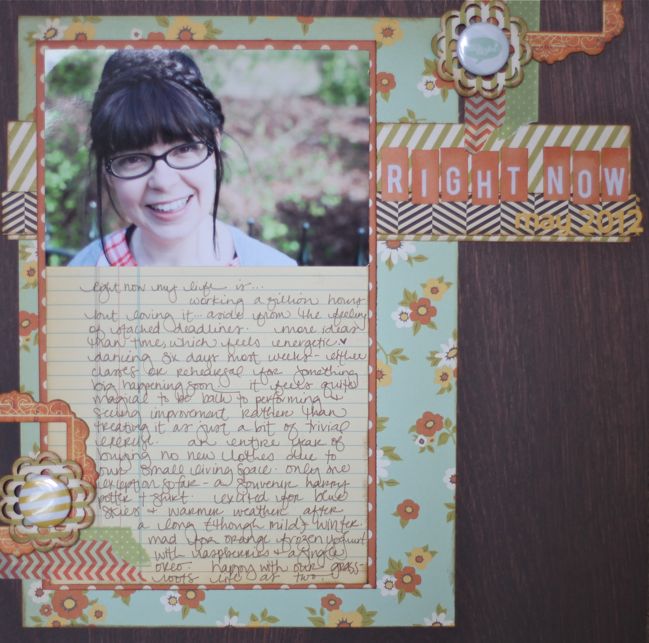
The latest Glitter Girl adventure at Two Peas in a Bucket is all about scrapping yourself, whether this is your childhood memories or your life today. Shimelle made two pages and I have scraplifted her 'Right Now' layout.

I used a photo from my birthday (which also appears in my Scrap Your Day mini-album) featuring me and my friends. Although it is a birthday photo, we meet every Friday for coffee and a chat so my journalling and title reflect this.

Supplies
Card - Bazzill Basics Kraft
Paper - Pink Paislee Snow Day,  Teresa Collins Timeless, Pebbles New Addition
Letters - Trimcraft Smirk 'For Her'
Sticker - K&Co Hannah Scrap Pad
Chipboard Mugs - Maya Road
Ink - Papermania, Dovecraft
Pen - Faber-Castell Pitt Artist Pen

Tools
Fiskars Shape Cutter & Circle Template
X-Cut Small Circle Punch

Friday, 23 March 2012

Fort Cornwallis

This week's Glitter Girl video at Two Peas in a Bucket is all about using up our scraps, and one of the pages she makes uses 12 1" strips of paper to make a panel across the page. I took this idea a bit further with a multitude of 1cm strips all the way across a double page:

It's another page from Malaysia, and most of the strips of paper are offcuts from other pages that I have made recently. How many do you recognise?

I made a couple of pockets behind the strips for our tickets and a leaflet about the fort. The bottom of the leaflet pocket is covered by one of the photos.

I didn't feel that the page needed any extra embellishments which would just compete with all the paper patterns.

Supplies
Paper - atd plus scraps 
Vellum - Anita's